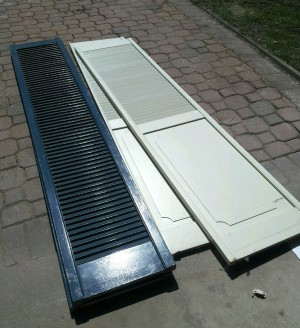
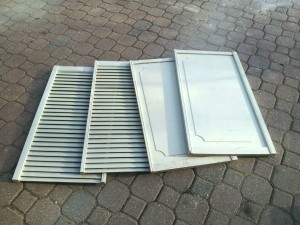
When I came across 2 pairs of old wooden shutters on a giveaway weekend, I knew they had potential to be turned into something amazing. Figuring out what they could be – that was a little harder. As an avid user of Pinterest, ideas began going through my head and I finally decided the best use for these would be shutter bedside tables with storage. It’s unique, it’s useful, it’s a great conversation piece, and it has not been done before (at least like this, which is the point of this tutorial!).
Assembling these was a bit tricky since the pair were not identical to each other, but I will give a step-by-step guide on how to do one for your place.
Materials you will need:
- Wooden shutters
- Table saw or hand saw
- Sandpaper
- 14 screws
- 2 hinges
- 1in. x 2ft x 10ft wood for the table top and bottom
- Paint brushes
- Low VOC paint
 Once you have acquired some large wooden shutters, you need to measure the height of your bed (or how high you want the tables to stand beside your bed) to know where to start cutting. Mine were about 34 inches for each side. Using a table saw or a hand saw, cut each shutter carefully along the measured length and sand off any rough edges after cutting.
Now comes the task of arranging them. Have a friend (or in my case, a very handy partner) hold the boards up while you bring their corners together. Keep the slats facing down and screw together the corners at the top and bottom. If you wish to add a door like I did, leave out one of the shutter sides during this step.
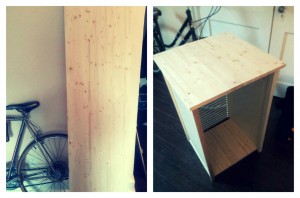
Then, measure the board for cutting a top and base that just extends past the width of the shutters. Secure the top surface and base with screws in the top and sides respectively. Since the shutters were solid wood, I also got (Forest Stewardship Council Certified) solid wood for the top and bottom instead of particle board or plywood to make it longer lasting.
Next comes attaching the front shutter/door. This part I found quite tricky to make it level and still secure it while attaching the hinges. I’m also not the world’s best handy-woman either. Before you put the door on though, make sure the slats are still facing down and decide which side you want to open, and you will put the hinges on the opposite side.
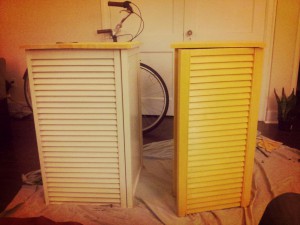
 Finally, after it is assembled, you get to sand and paint it! I chose a Low VOC paint in yellow, to brighten up the room a little. You can of course choose whatever colour you want, however, I strongly recommend low or zero VOC paints for many reasons.
Overall, I tried to re purpose materials and/or source eco-responsible ones as much as I could. With getting the extra materials for this project, each table roughly cost $50. You never know what treasures you could find being given away, but if you have made it through all the steps, congratulations! You now have your own unique shutter side table.
Have you done DIY projects like this? Share them in the comments section below!


Interesting article and your DIY ideas, I got some knowledge from your article. Thank you so much for sharing.
Really like youir idea!We recycled bifold doors w/ slants into shutters for our windows-
on the OUTSIDE!! Remembered same from my oldest brother;s place in Sunny & Hot LA! Makes a very big difference w/ keeping house cool & save on energy.
Just measure windows, cut bifold door to fit,
place hinges on window& bifold, good to go. Usually lasts 2-3 years if not too much rain!! Did not bother to paint or varnish as already treated from lumber yard. Yes to the ReStore and Free days!!
That’s a very creative idea, Jane! I’ve never thought of using doors as shutters, but it sounds very resourceful and unique. Thanks for sharing!